Shallow Depth of Field: 5 Tips on How to Achieve the Look
Hire film gear from local filmmakers.
Hire film gear from local filmmakers.


Have you ever admired a beautiful portrait where your eyes were drawn to the model’s face? The stunning photo was likely achieved by using a shallow depth of field (DOF). Can you do the same?
Of course, you can! Learn what a shallow depth of field is, what affects it, and how you can master it by reading on.
New to photography? Explore Photography 101 to get back to the basics.
What is a shallow depth of field?
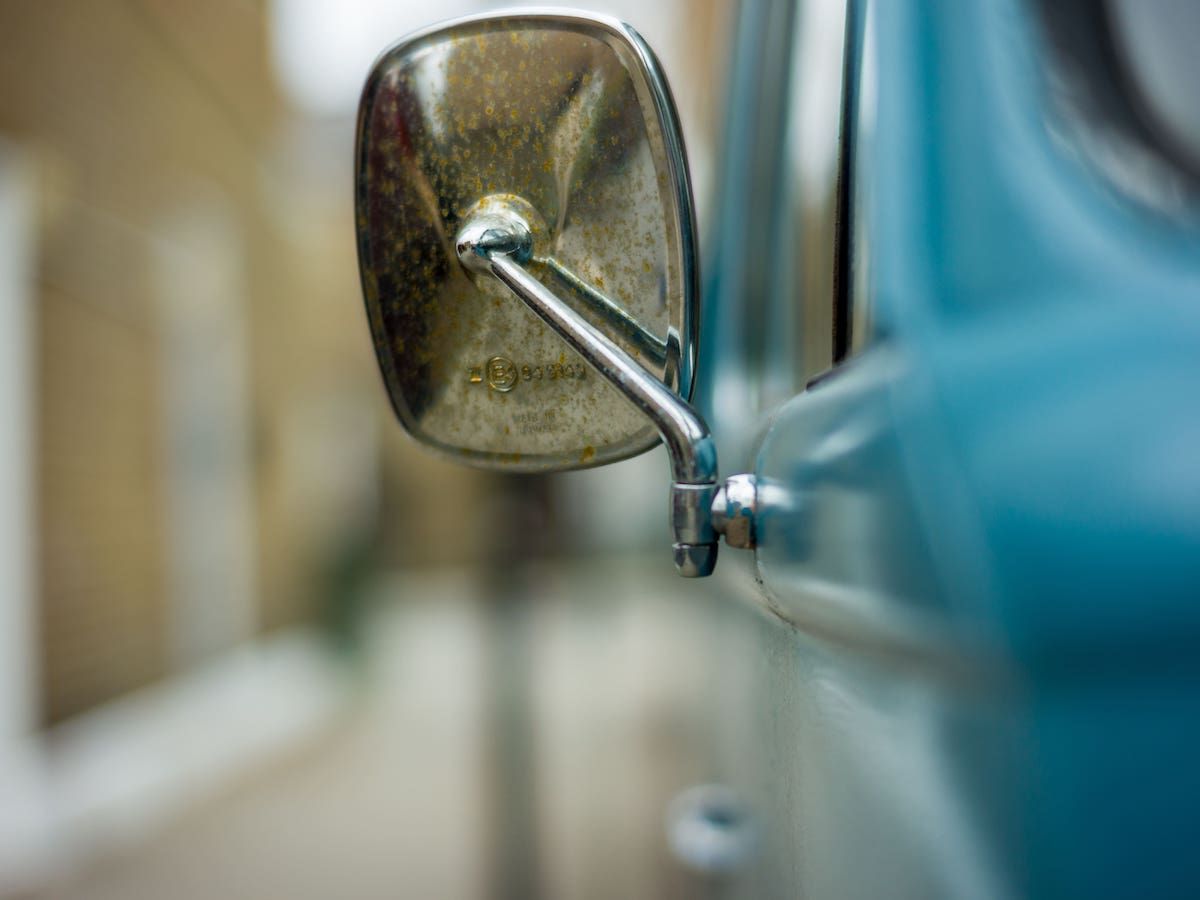
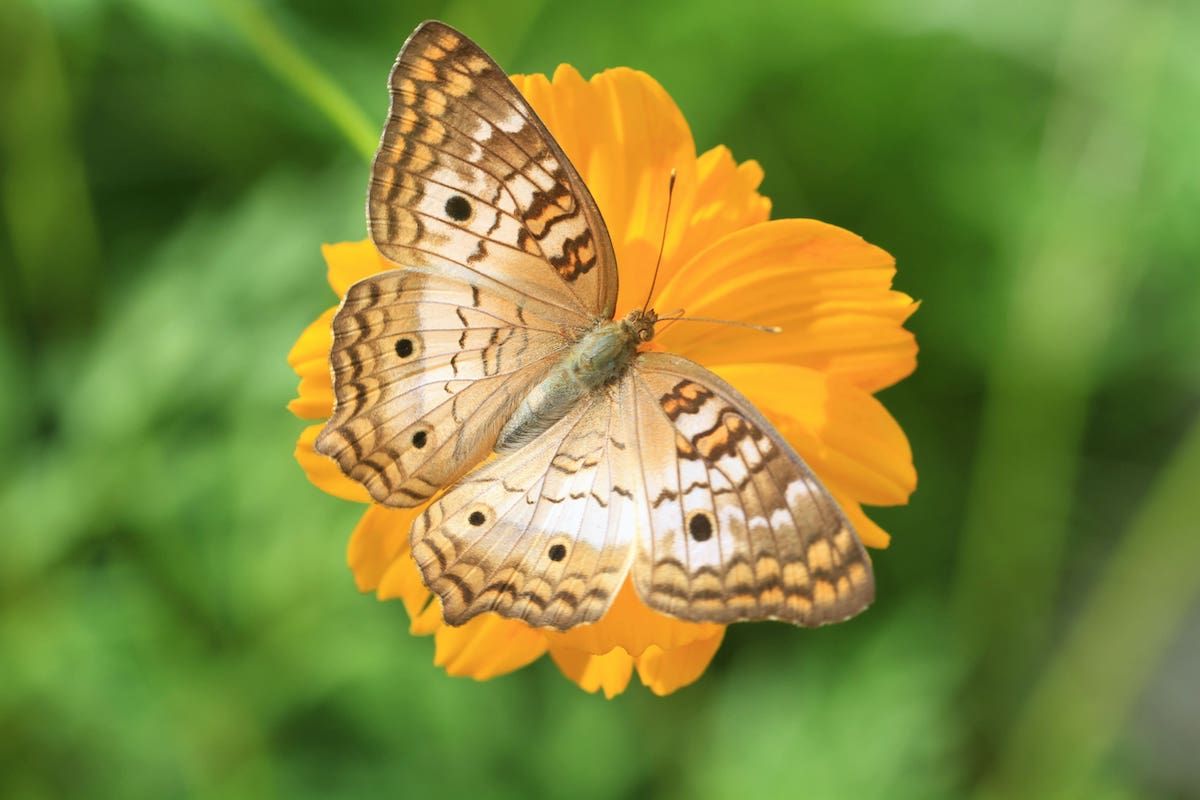
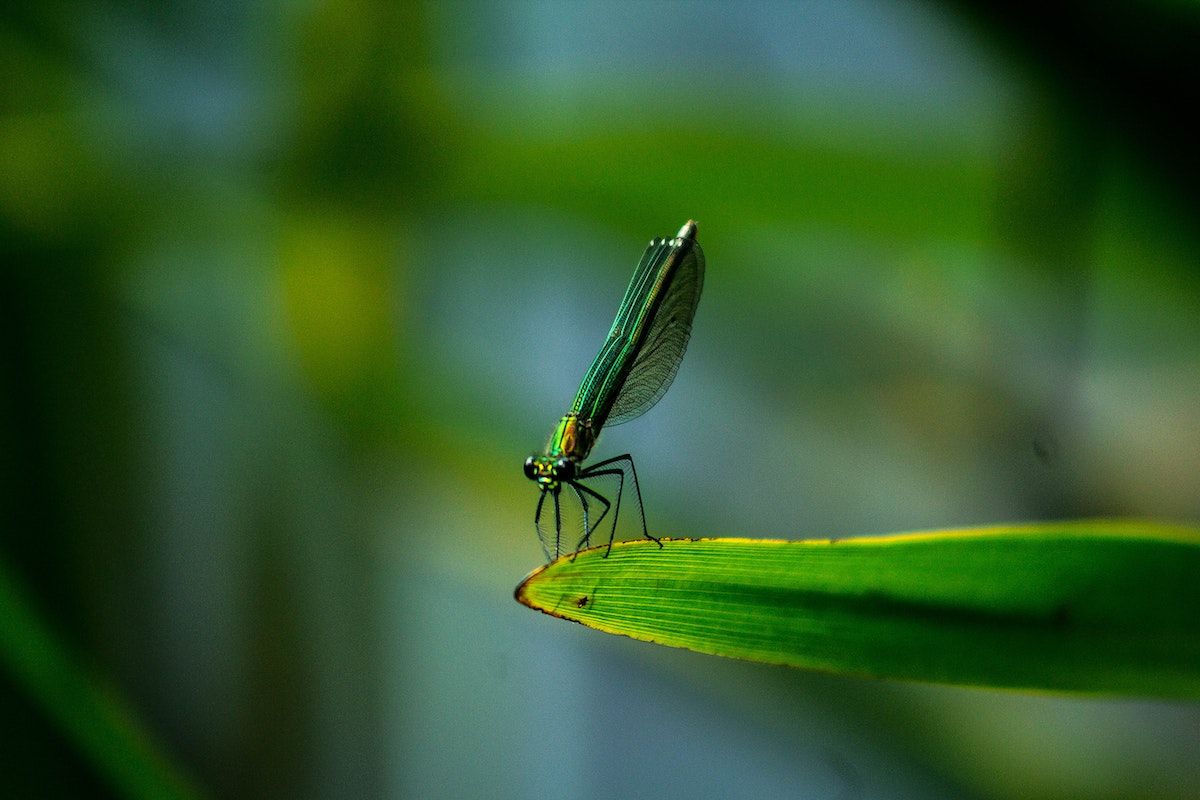
Every image has a focal point where you focus your camera. Everything on the same plane will always be in focus. A shallow depth of field means that everything besides this plane is out of focus or blurry.
In layman’s terms, only a small part of your image is sharp. If you want your subject to be crisp while your background and foreground are soft and blurry, learn to create a shallow DOF.
Shallow, narrow, and small depth of field all mean the same thing and can be used interchangeably.
What’s the difference between a shallow and deep depth of field?
A deep depth of field means your entire image remains in focus.
While a narrow DOF is frequently used for portrait photography and captured with a long lens, a deep DOF is preferred by architecture and landscape photographers who achieve it with a wide-angle lens.
What affects a shallow depth of field?
Understanding the relationship between your camera’s basic settings is crucial to achieving an attractive shallow depth of field effect.
Balance your aperture, shutter speed, ISO, and focal length for polished images, and if you’re in doubt, refer to Photography 101.
Aperture
Aperture refers to how much your lens’ diaphragm opens up. A large aperture, aka a small f-stop number, will create a smaller depth of field by letting in more light. This is often the easiest way of achieving a narrow DOF.
However, you can’t always use a large aperture if your shutter speed or light conditions won’t allow it.
Distance between you and the subject
It doesn’t get more manual than walking closer to your subject. The closer the distance, the smaller the depth of field will get. This is due to the background elements being pushed behind the plane of focus.
Don’t disregard this quick and easy solution if you’re looking to make your subject pop from the background.
Focal length
The longer your camera’s focal length, the shallower the DOF will get. This is due to the lens’ physical size affecting the distance between the sensor and the light’s intersection.
A telephoto lens and anything above 100mm will likely be great for portraits and create the desired blurry background.
Camera sensor size
Your camera’s sensor size also indirectly affects the depth of field. The larger the sensor, the shallower the DOF. This is due to the crop factor that stems from the size difference.
A four-thirds system in mirrorless cameras has about a 2x crop factor compared to a full-frame system. An APS-C sensor falls between the two, with around 1.5-1.6x crop factor depending on the manufacturer.
This factor refers to the fact that a sensor will capture different portions of the image depending on its size. The relative focal length and aperture are affected too.
This isn’t something you need to keep in mind when trying to achieve an attractive small DOF unless you’re ready to swap out your camera body for a full-frame model.
5 Ways to achieve a shallow depth of field

Want to experiment with a small DOF? It’s time to put your camera in manual and get shooting.
1. Use a long lens and move closer to your subject
You don’t need fancy lenses to experiment with a shallow DOF! Simply move closer to your subject to separate them from the background.
Using a 100mm lens or even longer from close up will separate and compress the background. This achieves the smooth background blur you’re after.
Don’t be intimidated if getting close to your subject feels awkward. It gets better with practice! Dot exercise caution if you’re an aspiring wildlife photographer.
2. Try a wide aperture lens
Using a fast lens with a low f-stop, ideally between f/1.4 and f/5.6, will let in a lot of light. This will shift your image’s plane of focus to somewhere between 5 to 50 cm. Place your subject in this area, and you have a beautiful shallow DOF effect.
If you’re uncomfortable with balancing exposure, try aperture priority mode. Here, you can set your desired aperture and let your camera compensate for it.
3. Increase shutter speed
If you’re shooting in manual, increasing your aperture will leave you with tons of light flooding your image, overexposing it. Increase your shutter speed to balance this, or combat it with an ND filter.
4. Use your camera’s portrait mode
If you’re a beginner in experimenting with depth of field, try locating Portrait mode on your camera. This will automatically increase your aperture to achieve a small DOF, but it won’t improve your manual photography skills.
It can come in handy in a pinch but generally isn’t recommended if you want to improve your craft.
5. Increase distance between the subject and the background
By moving your subject further from their background, for example, a wall, you can create a softer background feel. Standing against the wall will put the subject and background on the same plane of focus, making it impossible to separate them visually.
Increasing this distance doesn’t technically change your depth of field, but it gives the appearance of the desired effect.
Advantages and disadvantages of a shallow depth of field in photography
Every coin has two sides. Should you use a shallow depth of field in your photos?
Advantages
Why do photographers use a shallow depth of field? There are several advantages. A well-executed narrow DOF:
- Separates your subject and makes them/it stand out,
- Creates attractive portraits where your model shines,
- Directs the attention of your viewer to where you want to,
- Create a visually appealing bokeh effect,
- Hides blemishes or imperfections in the background, and
- Adds depth and intrigue by defocusing certain areas.
Disadvantages
There are also disadvantages to consider. This technique can:
- Create uninteresting photos where the viewers’ eyes can’t wander,
- Ruin pictures where there isn’t a single point of focus, like a landscape, and
- Lose the context of the photo.
Become a better photographer
Get out there to experiment with a shallow DOF! See how this technique affects your visual storytelling and master it to create your artistic vision.
Deep dive into the world of photography with Photography 101 to learn more techniques.
Have fun experimenting with a shallow depth of field!
What is a shallow depth of field?
A shallow depth of field creates an image where only certain parts are in focus.
How to get shallow depth of field?
You can achieve a shallow DOF by using a wide aperture and moving close to your subject while separating them from the background.
What is shallow depth of field in photography?
In photography, a shallow depth of field refers to only one focal plane being in focus. The rest of the picture is out of focus or blurry.
What is an example of shallow depth of field?
Most portraits use a shallow depth of field, focusing on the model’s eyes and throwing the background out of focus.